CalculaTR: Admin Guide
Learn how to manage and customize your calculators

Written by Tesa Wilson
Updated at January 15th, 2025
Table of Contents
Login


Navigation
CalculaTR admin tools can be accessed via REProTool from the CalculaTR navigation by an Agency Admin.

The CalculaTR navigation can be opened or collapsed using the arrow at the top of the menu.

Agency Options
Expanding Agency Options will display Rate Sheets, Application Options, County Tax Year Start Dates and Script Generator.

Agency Options - Application Options
Application Options is where you can find the options to display the Equal Housing Opportunity Logo and the option to Enable Co-Branding on Net Sheets. The Modified By and Modified On columns will update with the user and date and time of the most recent update.

Agency Options - County Tax Year Start Dates
Under the County Tax Year Start Dates, each county can have their Tax Year Start Date set using the calendar selection icon.

Agency Options - County Tax Year Start Dates
The Script Generator tab is used to create Javascript script tags to embed calculators into your own website. Scripts can be generated for a single calculator or all calculators.
 Use Generate Tag for All Calculators to create a script tag for all calculators. Follow the instructions on the modal to display all available calculators.

Use the pencil edit icon in line with a calculator from the table to create a script for that particular calculator. Follow the instructions on the modal to display the selected calculator.

Saved Calculations
As an Admin, saved calculations for all users in the agency can be viewed for both manually saved and auto saved calculations.

All saved calculations can have reports downloaded and deleted using the appropriate icons in-line with the save. Clicking the saved calculation line will open the saved calculations where the info can be edited and then resaved.

Checking the Show auto saved calculations box will display all calculations saved with an auto save. To change which types of saved calculations you are using, use the dropdown to switch between Seller Netsheet/ Buyer Cost Sheet and Loan Estimate.

Agency Settings - Rate Sheets
The Rate Sheets tab is used to upload and manage rate sheets. You can download the provided rate sheet template and upload it as well as delete any unneeded Rate Groups.
 A Rate Sheet Template option is provided to assist in putting together an excel sheet you can upload. When you click the rate sheet template button, the template will be downloaded.

Rate Sheets can be uploaded by using the Choose File button or dragging a valid excel file into the drag and drop area. The Sheet Name will need to match the tab name in the excel file. The Range Group Name will be the name that displays in the Active Rate Groups table. Clicking the ? icon on either field will display a help box with information about each field.

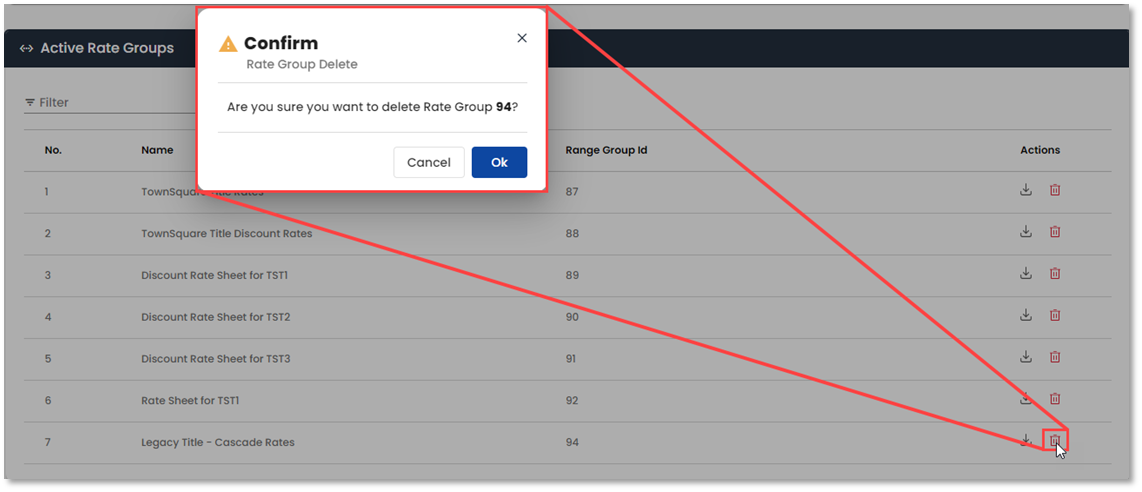
Active Rate Groups will display in the table and can be deleted using the trash can icon. A confirmation modal will display asking if you are sure you want to delete the rate group. Click OK to confirm the deletion.
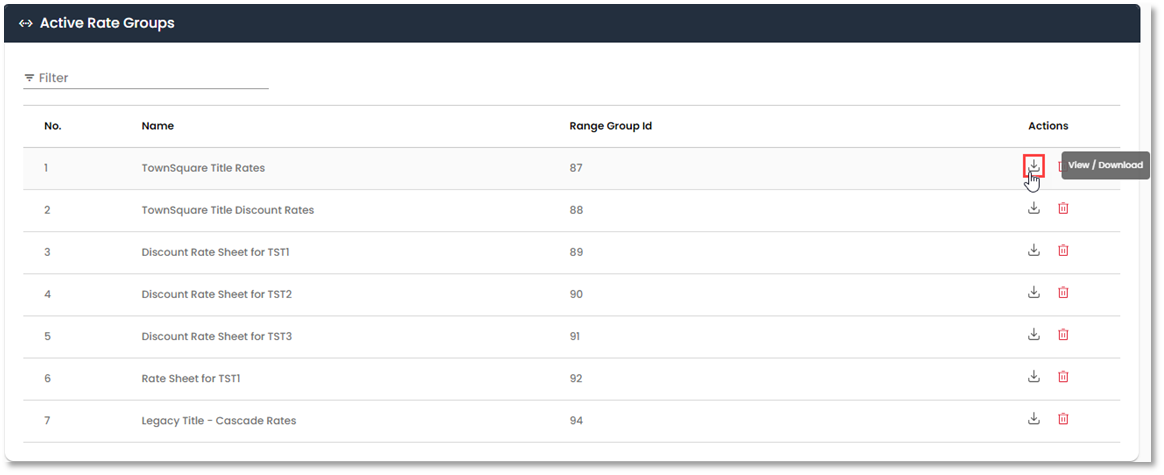
Previously uploaded Rate Sheets can be downloaded using the View/Download button.
You can see the values in a Rate Sheet by selecting the line. This will open a popup with all the rates entered into the uploaded Rate Sheet.

Calculator Settings
Expanding Calculator Settings will display Seller Netsheet/Buyer Cost Sheet and Loan Estimate. Fee Groups, Fee Delineators, Section Settings and Field Settings for each calculator type can be found under their respective category.

Calculator Settings - Fee Groups
The Fee Groups tab is used to upload and manage fee sheets. You can download the provided fee sheet template and upload it as well as delete any un-needed Fee Groups.
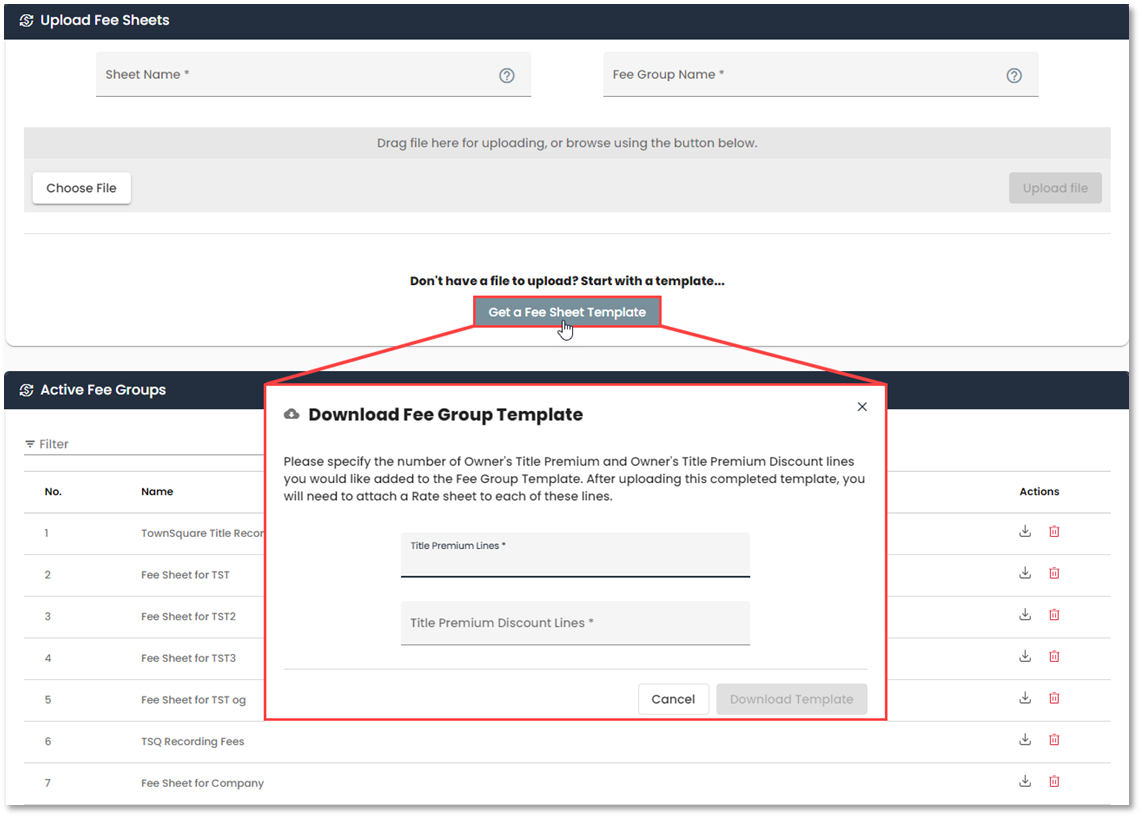
A Fee Sheet Template option is provided to assist in putting together an excel sheet you can upload. When you click the fee sheet template button, a modal will display asking how many Title Premium Lines and Title Premium Discount Lines you would like to add to the template. A value between 1 and 20 must be entered for each field. Click Download Template when both fields are entered.
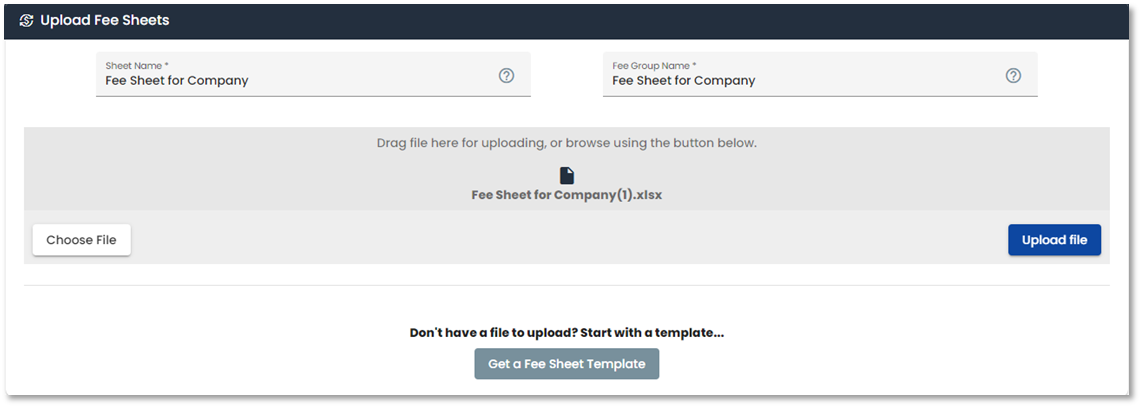
Fee Sheets can be uploaded by using the Choose File button or dragging a valid excel file into the drag and drop area. The Sheet Name will need to match the tab name in the excel file. The Fee Group Name will be the name that displays in the Active Fee Groups table. Clicking the ? icon on either field will display a help box with information about each field.
Active Fee Groups will display in the table and can be deleted using the trash can icon. A confirmation modal will display asking if you are sure you want to delete the fee group. Click OK to confirm the deletion.

If a Fee Group is assigned to a section upon deleting, a confirmation modal will display asking if you are sure you want to delete the fee group and informing you that the fee group will be dissociated from the section.

Previously uploaded Fee Sheets can be downloaded using the View/Download button.

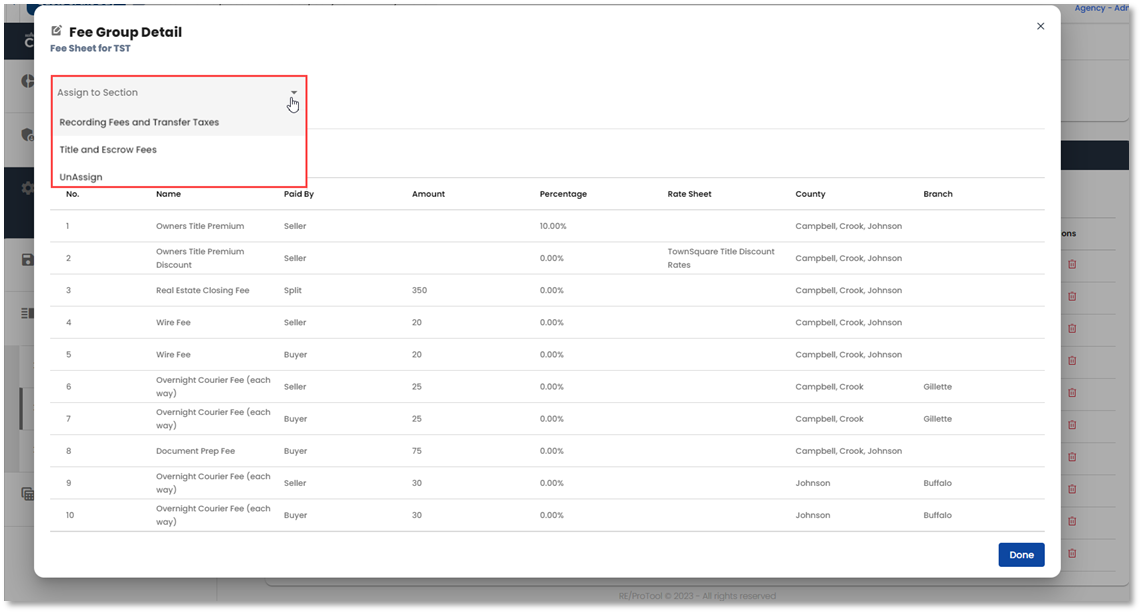
To assign a Fee Group to a section, click the line of the Fee Group and use the dropdown in the pop up to assign it to the desired section. To remove a Fee Group from a section you can use the dropdown and select UnAssign.
Calculator Settings - Fee Delineators
Fee Delineators is used to view, add and delete delineators used on the net sheet. Both the Fee Groups and Rate Groups templates will pull from the Fee Delineators table.
Fee Delineators are mostly user created, though there are some such as County that are system defined. Delineators marked true for Is System cannot be edited or deleted. Any delineators marked true for Is Locked can be edited, but not deleted. Delineators marked false for Is Locked and Is System can be edited and deleted.

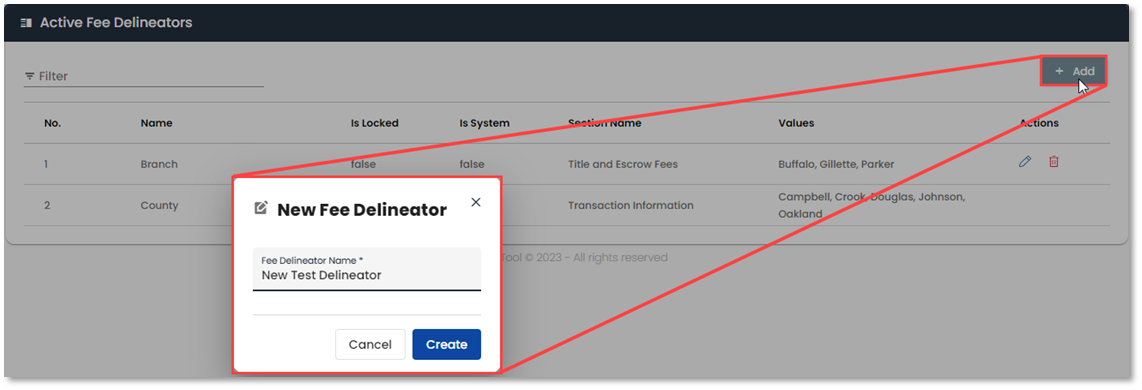
New Fee Delineators can be added using the +Add button. Enter your desired delineator name and click Create to display the delineator value fields.
After creating a new delineator, you will be able to add new values. Multiple values can be added at once using comma, semicolon or enter key.

Fee Delineators can be moved to different sections in the NetSheet using the Section dropdown. The next time the NetSheet is loaded, the Fee Delineators will display in their selected Section. If data was entered prior to moving a Fee Delineator and you opt to keep the data when prompted on the NetSheet, the Delineator will display in the prior location.

Delineators can have default values set from the list of added values. If the Multiselect option is checked, multiple default values can be set.

If a delineator is marked as Required it will be locked to the Transaction Information section and will be required to be filled out when entering calculations.

Delineators that are marked false for Is Locked and/or Is System can be deleted by using the trash can delete icon in line with them on the main delineator table. A confirmation modal will display asking if you are sure you want to delete the delineator. Click Proceed to confirm the deletion. If a delineator has been used in an uploaded rate or fee sheet, you will receive an error when attempting to delete it.

Fee Delineators and their values will display under their assigned section of the Seller Net Sheet, Buyer Cost Sheet, or Loan Estimate depending on where they are placed via the Fee Delineators tab.

Calculator Settings - Section Settings
The Sections Settings tab will allow you to alter the names of some Seller Net Sheet, Buyer Cost Sheet or Loan Estimate section headers as well as set the display preferences for some.
Section Settings will display a list of available calculator sections. Anything checked is currently displayed and those with greyed out checkboxes cannot be hidden.

You can use the in-line active checkboxes to select which sections are displayed and which are hidden. Clicking the pencil edit icon will allow you to alter the Section Name and where applicable, the option to hide/show section can also be set here.
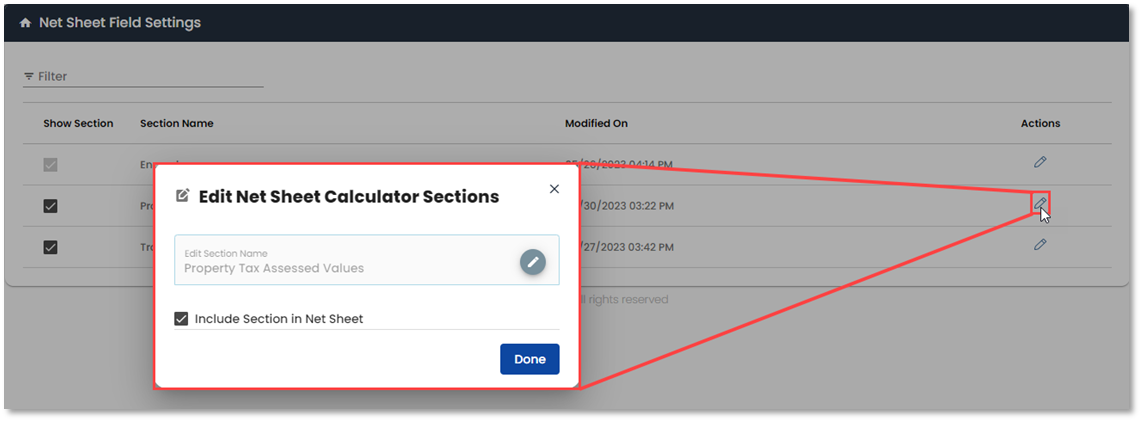
To edit the name of a Section, click the pencil edit icon in the name field. Once you have set the desired Section Name, click the save icon and Done.
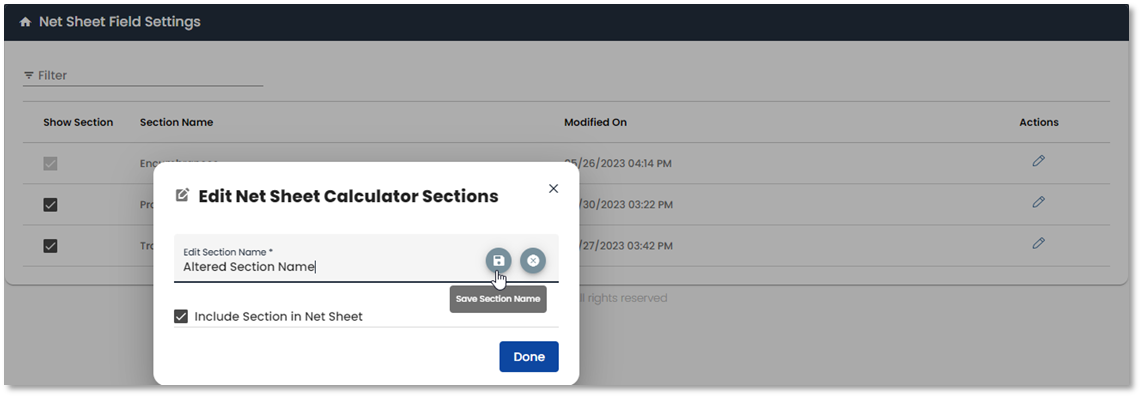
When the update has been made, a success message will display and the Modified On date will update with the date and time the change was saved.

Calculator Settings - Field Settings
The Field Settings tab will allow you to alter the names of some section headers on the Seller Net Sheet, Buyer Cost Sheet or Loan Estimate, as well as set the display preferences for some.
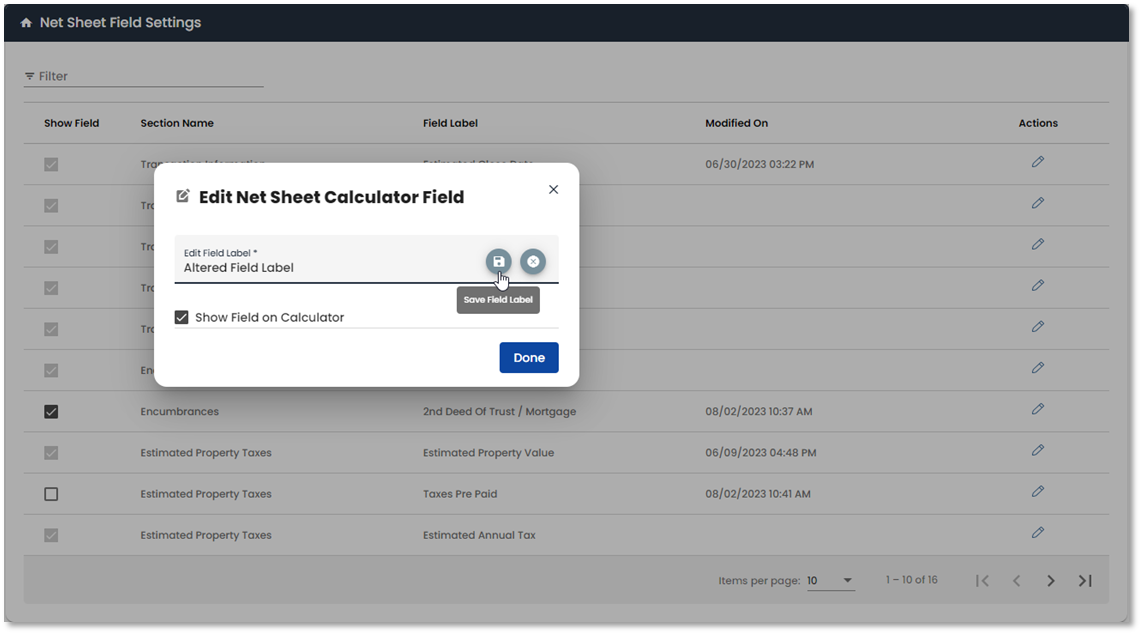
Field Settings will display a list of available fields and what Section they are under. Anything checked is currently displayed and those with greyed out checkboxes cannot be hidden. You can set the Items per page by using the dropdown on the bottom of the list as well as navigate through the pages with the arrows.

You can use the in-line active checkboxes to select which Fields are displayed and which are hidden. Clicking the pencil edit icon will allow you to alter the Field Label and where applicable, the option to hide/show Field can also be set here.

To edit the name of a Field, click the pencil edit icon in the name field. Once you have set the desired Field Label, click the save icon and Done.
When the update has been made, a success message will display and the Modified On date will update with the date and time the change was saved.
